
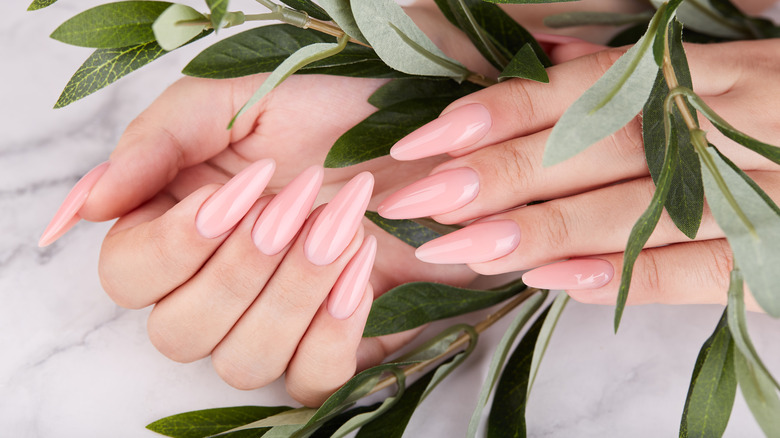
We’ve all been there: you spend time doing your nails, hoping for a smooth, long-lasting manicure, but a few days later, they’re chipped, peeling, or your cuticles are a mess. I used to struggle with this CONSTANTLY—my nails were weak, my cuticles were dry, and I could never keep polish on for more than 48 hours. Turns out, I was making a bunch of simple manicure mistakes without even realizing it. Today, I’m spilling all the common errors I’ve made (and seen my friends make!) when it comes to nail care, plus the easy fixes, my go-to护甲 products, and the trending manicure styles you’ll want to try this season.
Nail care isn’t rocket science, but it’s easy to slip into bad habits that damage your nails over time. The good news? Most of these mistakes are super easy to fix—you just need to know what you’re doing wrong. Let’s dive in!
The Most Common Manicure Mistakes (And How to Fix Them)
Let’s start with the two biggest culprits I see all the time—these are the mistakes that were ruining my nails for years, and I bet you’re guilty of at least one of them.
Mistake #1: Using Nail Polish Remover Too Often (Or the Wrong Kind)
Raise your hand if you’re someone who peels off chipped polish, then immediately grabs the nail polish remover to clean it all off—only to repaint your nails the same day. 🙋♀️ Guilty! I used to do this every few days, thinking it was no big deal, but turns out, frequent use of nail polish remover (especially the acetone kind) is terrible for your nails.
Acetone strips your nails of their natural oils, leaving them dry, brittle, and prone to breaking. Even non-acetone remover can be harsh if used too often. The fix? Only remove polish when it’s really chipped (not just a tiny nick!), and give your nails a break between manicures—aim for 2-3 days of bare nails to let them recover. When you do use remover, opt for a gentle, nourishing formula (look for ones with vitamin E or jojoba oil) and use a cotton pad, not a rough cloth, to avoid scratching the nail surface.
Mistake #2: Biting Your Nails (Or Picking Your Cuticles)
This one is personal—for years, I was a chronic nail biter, especially when I was stressed. Not only does it look messy, but biting your nails (and picking your cuticles) can cause so much damage: it tears the cuticle (which protects your nail bed from infection), leaves your nails uneven and weak, and can even lead to painful hangnails or ingrown nails.
The fix? I know it’s easier said than done, but try keeping your nails trimmed and polished (even with a clear coat!)—it’s harder to bite nails that look nice. If you catch yourself biting, keep a small tube of cuticle oil in your bag and apply it instead (it keeps your hands busy and nourishes your cuticles at the same time). For cuticle picking, resist the urge to peel or pull—we’ll talk about the right way to care for cuticles next!
The Correct Step-by-Step Manicure Routine (You‘re Probably Skipping Step 1!)
Now that we’ve fixed the mistakes, let’s talk about the right way to do a manicure at home. I used to skip so many steps, thinking “it’s just polish—how hard can it be?” But these three simple steps will make your manicure last longer and keep your nails healthy.
Step 1: Trim, Shape, and Gently Push Back Cuticles (Don’t Cut Them!) – First, trim your nails to your desired length (I prefer mine short, just above the fingertip) and shape them with a nail file (file in one direction—back-and-forth filing weakens nails!). Then, take a cuticle pusher (or even the back of a spoon, if you don’t have one) and gently push back your cuticles. Do NOT cut your cuticles—they’re there to protect your nail bed, and cutting them can lead to infection. If you have excess skin around the cuticle, use a cuticle nipper (very carefully!) to trim only the dead, dry skin—never the living cuticle.
Step 2: Disinfect Your Nails – This is the step everyone skips, but it’s so important! After pushing back cuticles, wipe each nail with a cotton pad soaked in rubbing alcohol or a nail disinfectant. This removes any oil, dirt, or bacteria from the nail surface, which helps the polish adhere better (no more chipping after one day!).
Step 3: Apply a Base Coat – I used to skip base coat to save time, but this is the secret to long-lasting polish and healthy nails. A good base coat protects your nails from staining (hello, no more yellow nails after wearing red polish!) and creates a smooth surface for the color to stick to. Apply one thin coat, let it dry for 2-3 minutes, then move on to your nail polish.
My Go-To Nail Care Products (Game-Changers for Weak Nails!)
After fixing my bad habits, I started using these two products, and my nails have never been stronger. These are my holy grails—affordable, easy to find, and totally worth the investment.
- Cuticle Oil – This is non-negotiable for me. I apply it every night before bed, and it keeps my cuticles soft and my nails hydrated. My favorite is the Burt’s Bees Cuticle Cream (it’s a thick, creamy formula that sinks in quickly) or the OPI Cuticle Oil (it has a subtle citrus scent and absorbs fast, so it doesn’t leave your hands greasy). If you’re a nail biter, keep a small tube in your pocket—applying it when you feel the urge to bite helps break the habit.
- Nail Strengthener/Base Coat – If your nails are weak, brittle, or prone to breaking, a good strengthener is a must. I love the Essie Nail Strengthener (it’s a clear base coat that also strengthens nails over time) or the Gelish Hard Gel Base Coat (perfect if you want a long-lasting manicure—just cure it under a UV lamp, and it keeps your polish on for up to two weeks). These products add a protective layer to your nails, making them stronger and less likely to chip or break.
Trending Manicure Styles to Try This Season (Easy to Do at Home!)
Now that your nails are healthy, let’s talk about the fun part—trends! These two styles are everywhere right now, and they’re super easy to do at home, even if you’re a beginner.
- Classic French Manicure – The French manicure is back, but this season, it’s softer and more natural. Instead of a sharp white tip, opt for a subtle, sheer white (or even a pale pink) for a “clean girl”vibe. To do it at home, use a French manicure guide (you can find them at the drugstore for $2!) to paint the tips, then seal with a clear top coat. For a modern twist, try a slightly curved tip instead of a straight one—so chic!
- Gradient Nails – Gradient nails are perfect if you want something fun but not too bold. All you need is two complementary nail polish colors (I love light pink and nude, or mint and white) and a makeup sponge. Paint one color on the bottom half of your nail, the other on the top, then dab the sponge over the middle to blend the two colors together. Finish with a top coat to smooth out any streaks. It’s easier than it looks, and it’s a great way to use up old nail polish!
Final Thoughts: Nail Care Is Self-Care
At the end of the day, nail care isn’t just about having pretty nails—it’s about taking care of yourself. For me, doing my nails is a little moment of self-care; it’s time to slow down, relax, and treat myself. By avoiding these common mistakes, following the simple steps, and using the right products, you’ll have healthy, strong nails that look amazing—whether you’re wearing polish or going bare.
Remember, it takes time to see results—don’t get discouraged if your nails don’t get stronger overnight. Be patient, stick to the routine, and soon you’ll be obsessed with your own nails. And if you try any of these trends or products, tag me—I’d love to see your manicures!